Visitors

Monday, 30 April 2018

Yule Tide Christmas Shop

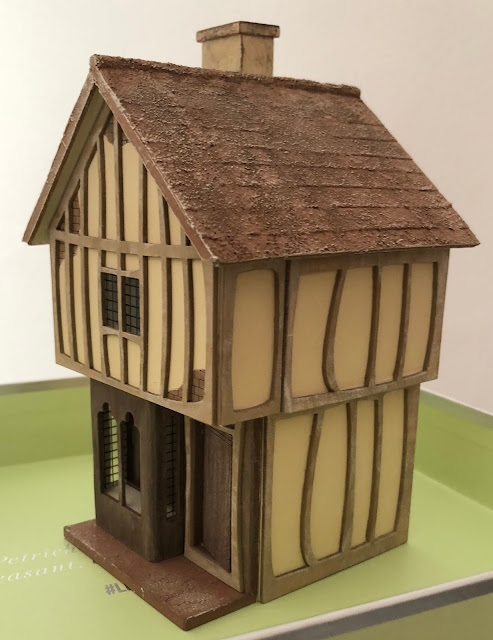
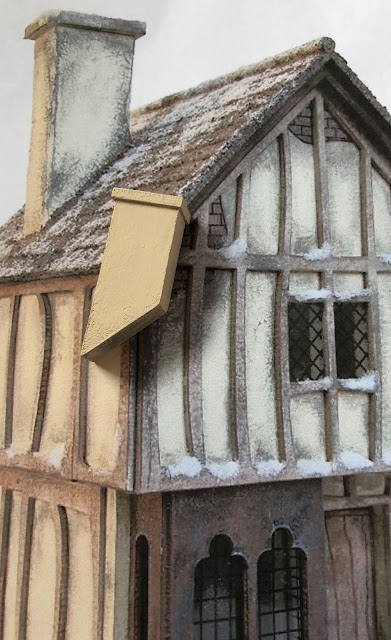
I took the plunge and distressed the chimney stack, and then completed the roof. First there's a layer of sand, which is then painted over, and distressed a little. 

Next comes the distressing of the rest of the building. I tried with a large brush but didn't like the effect, so I'm going to try again with a thinner brush - see how that goes.


Sunday, 29 April 2018

Mulberry House

I thought I'd do a bit of tidying up in the craft room. Actually I wanted to see if I could find the Mulberry House kit! I wasn't in there for very long when I found a lid like the pink one below, and I went to look inside what I thought was the rest of the nest of boxes. I thought, if the box which goes with the lid isn't in there, I'll throw the lid away. Imagine my surprise when I opened the box and found ... the Mulberry House kit! AND it's a lot more "done" than I remember!!
  

Ta daaaaa ...


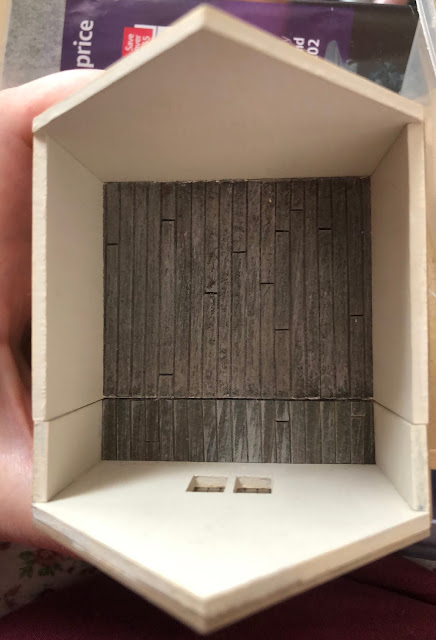
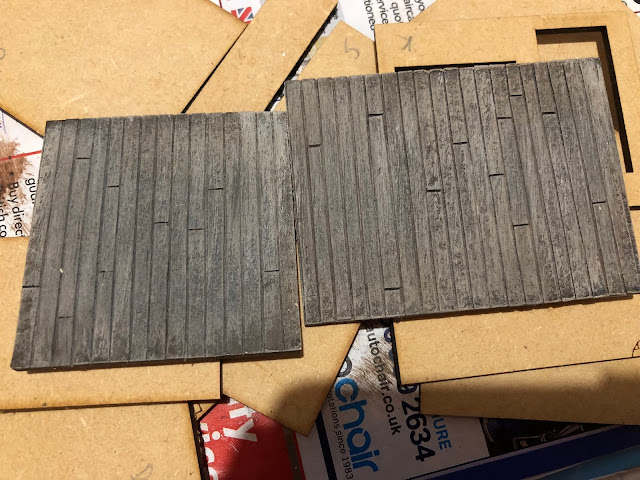
The floors are done too - 2 planked and the one on the left of the photo above, a black and white tiled floor. I wondered where I'd bought that, because I've been looking for 1:48 flooring and can't find any realistic ones. Turns out it's a cut-out from the instructions book! Thank you, Bea!

I've put the kit into another of the beauty box boxes and put it with the rest of my kits.

The house reminds me of a hotel we stayed in in London last year ... so I'm thinking I could make a hotel for a change. We'll see ... Mulberry House Hotel. Hmm ... Ground floor, reception and breakfast room. The rest, of course, will be hotel rooms.


The Prince William Hotel, London.

Saturday, 28 April 2018

Organised!


I've put the mini kits in boxes. Have put all, except for Yule Tide Christmas Shop and Winterberry Hall on the table in the craft room. I want to finish Yule Tide, and then go on with Winterberry Hall. And, of course, I would like to work on the rest of the buildings after that. 


Friday, 27 April 2018

Pins & Needles Kit by Jane Harrop


I received this kit, from Jane Harrop, today. I had a feeling I had made this up before, but wasn't sure. But, yes, here it is (below)! This little cabinet is going to go in my haberdashery shop, so I think I'll make up the second kit to go either in my dollshouse, or in my sewing room roombox. This one is 1:12 scale. I've made several of Jane's kits, and they're very well put together, very detailed, and the instructions are very clear and straightforward.

I'm going to have a look at her smaller scale kits too ...


Thursday, 26 April 2018

Yule Tide


I wanted to finish painting the chimney last night, so I could attach it to the roof, and then add sand and paint the roof tiles today. I tried to distress it, but went too far, so I got it back to the cream colour, and will use Petite Properties' Mucky Paint to distress the chimney and the rest of the building. 

I printed out another view of the building, so I could see more of the chimney. Then when I went to take a photo for the blog - of the print-out and the chimney - I noticed that the "glass" on the first floor window should have been set as a diamond pattern ... I can't change the acetate now because it's sandwiched between the wall and the wall beams! Oh, well ...


I'm trying to pluck up the courage to attempt the distressing! Not in the right frame of mind today - I'm very sleepy ...


Wednesday, 25 April 2018

Yule Tide Christmas Shop


The first floor floorboards. This is going to be a bedroom. I may add a door on each floor.


I could have waited for the pre-cut roof tiles from Petite Properties, but if I stop now there's the danger that this little shop won't be finished for a while, so I decided to go ahead and use the paper, and the instructions, which came with the kit.  


I think they turned out better than I was expecting. I have to finish painting and distressing the chimney next, and sticking it to the roof, and then covering the roof with sand, and painting and distressing the roof.


Progress ... and not a lot more left to do. 

The wonky tile strips from Petite Properties are available again, so I ordered some for Winterberry Hall - I don't fancy cutting all those strips, and especially cutting the edges on random tiles to distress them ... Since I was ordering the tiles I thought I'd buy some furniture kits for the Yule Tide shop. I was thinking of having a workshop on the first floor, but I'm going for a bedroom instead! I've got lots of ideas of things to make to "sell" in the shop, but I'm not sure how much is going to work at this tiny scale.

I noticed a scratch on the front window "glass", but luckily I have a spare piece which will fit, so I'll replace it when I've finished with the shop, just in case I damaged the new bit of acetate. 


Yule Tide


Here's the front of the building. Think it's turned out quite well! Want to add a handle/knob to the door.

Tuesday, 24 April 2018

Yule Tide


I'm not sure if this is going to work, but I've put on some soft clay to cover the grooves on the sides of the window surround, and the damaged bit on the left side. I'm going to leave it to dry properly, and then I'll sand it down and see what it looks like. I can't find the pot of wood filler ...

Later ...  No, didn't work! I found the wood filler (it pongs), and I'm waiting for it to dry so I can sand it down and re-paint.


Yule Tide Christmas Shop

I spent most of yesterday working on Yule Tide. I mixed my own colour for the exterior walls. I also mixed a colour for the beams for the exterior, and distressed the beams a little with white paint. I will tackle the distressing on the walls at a later stage.


The shop window front is made from mountboard, and I managed to damage one side ... I started painting the piece, but I don't like how it looks, so I'm going to try and fix the damage with wood filler. 


~~~~~~~~~~~~~~~~~~~~~~~~~~~~~~~~~~~~~~~~~~~~~~~~~~~~~~~~~~~~~~~~~~~~~~~~~~~

After I'd assembled the overhang piece yesterday (below↓) I realised I'd have to plank that bit of floor too, and was worried I wouldn't get the same shading. Luckily I managed to get the same colour on the new floorboards - phew! 

I like making these planked floors, I made these really quickly today. I cut a piece of printer paper, put that over the first floor planks, and run a pencil over the planks, so I'd get the same spacing. Even though you won't be able to see the full length of the floorboards when the front is on, I still wanted to get it right! Then I lay the card strips onto the scrap of paper, and when it was finished I carefully cut it into size and stuck it on with Tacky Glue! 

The colour looks better in the flesh - it's more brown than grey.


I'm now thinking about making it with a detachable front after all. I don't think you'd be able to appreciate all the hard work on the floorboards, or the furnishings, if I stuck the front onto the shop.

Monday, 23 April 2018

Yule Tide Christmas Shop

Here's a picture of the original Yule Tide Christmas Shop. Let's see how close I can get with mine ...
This is another of the 1:48 scale Petite Properties buildings.

Here is the story so far ...


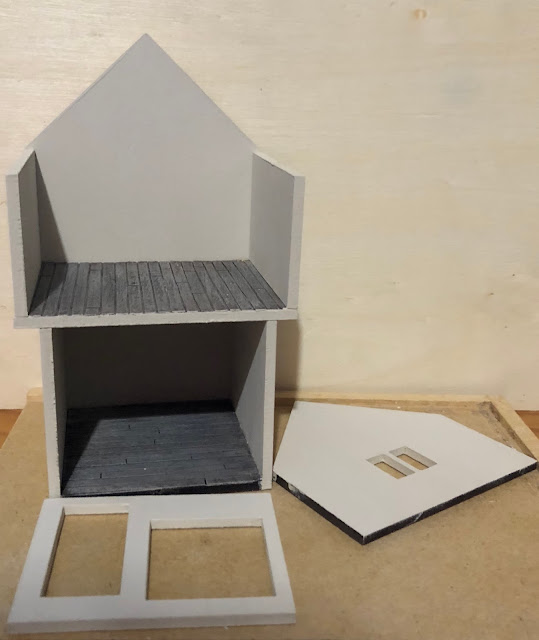
Making the wooden floors. I didn't realise two of the sides of the ground floor floor were slightly larger, and I've laid the "planks" horizontally on the ground floor, and vertically on the first floor. Don't think it matters though.


Decided to paint the wood pieces black first, then stuck on the strips of card, and repainted those black. It works better. I made the two floors at the same time so I could get them the same colour.  I like the way they've turned out. In person the colour is slightly browner.


And here's where I've left it for tonight. I'm thinking of making it shut. That is, I will furnish the two rooms - shop at the bottom, and either a bedroom or a workshop on the first floor, and then glue the fronts on. 

Although the interior walls looke grey in the photo, it's a creamier colour. I've used Petite Properties' Wishy Washy Stone. 


Sunday, 22 April 2018

Washtub Cottage


Was tidying my mess of a craft room and I came across a blue plastic box with the two Petite Properties money boxes (a house and a shop), which I knew I had, but didn't know where they were. There is also another kit I'd completely forgotten abount inside that box! It's another of the Petite Properties 1:48 scale buildings, and it's called Yule Tide Christmas Shop. 

And I've only just realised I must have another kit somewhere - if not in the packet with the Yule Tide  shop kit. That one is called Mulberry House ... 

The photo here is of Washtub Cottage. I've started painting the interior, and painted the three floors. I have two mountboard partitions cut out, but the groove in between the two ground floor floors is too wide, so I'm going to have to stick two of the partition pieces together, or make them out of foamboard instead. We'll see ...

Also the top floor has another partition, but I forgot to leave the gap. That should be easy enough to fix.
Sunday, 15 April 2018

Busy Doing Nothing


Today did some painting, some gluing ... Eventually I should get them all finished! The one in the photo is the 1:144 scale Rosebud Cottage. I'm missing the two porch side pieces. I've added the fireplaces to the interior, although the front and roof will be glued down. 

Wednesday, 11 April 2018

Rosebud Cottage


Well ... I was putting everything away until tomorrow, and I couldn't resist sticking a few more bits together. This is another of the 1:144 scale Petite Properties cottages - Rosebud Cottage. This one is going to be painted a very pale pink. 

This is a photo of the original - I'm taking inspiration from the colour. OK, OK, I'm copying it ...!

Cereal Bars


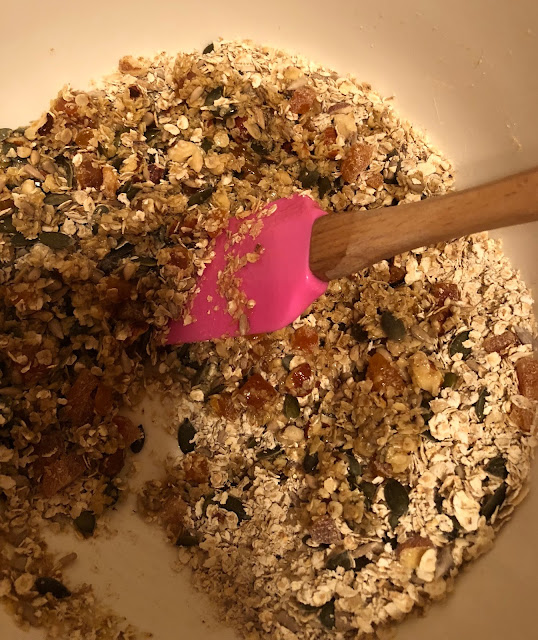
Made these today. They're delicious! I bought a 9" square tin with a lid, and it's great. This is the second time I've made these, and these are better because the tin I used the first time was smaller so the bars were a little bit thicker. These thinner ones bake a bit better - they're crunchier. 

Flower Pot Cottage


OK, so this is how I do things. Instead of going on with Winterberry Hall I decided I'd put together this 1:144 scale cottage I've had for ages. I've decided not to decorate or furnish the interior, and I think I may use it in a miniature shop some day. 


Painted the interior white, but decided not to go any further. If I'd made it to furnish, and with a removable front and roof, I'd be wary of losing bits all the time!


This is it so far. I need to tidy up the paint, sand down the joins, paint closer to the window frames, add another layer of sand "thatch", add the chimneys and landscape the patio!

This is another of the Petite Properties cottages. I have another two in this scale.

Tuesday, 10 April 2018

Bromley Crafts Stencils


I received the stencils and paint texture additive from Bromley Crafts today, so I can now stencil the ground floor of Winterberry Hall.  I've got the interiors painted, but can't stick walls together until I've  made the slates for the ground floor. I've been waiting for these to arrive, and I was raring to go on completing the stencilling ... but it's very dull, wet and windy today and I just want to sit here and watch films on the computer!  ☔


Saturday, 7 April 2018

Winterberry Hall


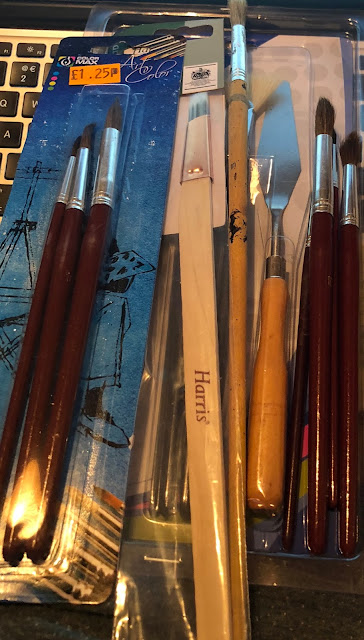
Dad bought me a bunch of brushes, so I can start painting tomorrow 😁

I ordered more paint colours, a couple of paint brushes, a scribe tool and some roof tile strips from Petite Properties earlier today. 

I have more of the Petite Propeties kits to complete. This is how I do things. At the moment it's miniatures, and I'll do nothing else for month. Then I switch to quilting or whatever and it will be months (even years) before I go back to miniatures! So I try and do as much as I can when I'm in the mood for a particular hobby, so I get to finish things.

Winterberry Hall


This is the Winterberry Hall 1:48 scale house from Petite Properties (http://petitepropertiesltd.com). I received the kit for the house yesterday, and another for the base, plus several pots of paint, the landscaping kit to complete the outside of the building, a couple of paint brushes, a fine tip adhesive applicator (very handy) and the little lamppost which goes outside Winterberry Hall.  I couldn't wait to start!

So far I've assembled the base, and stuck a few bits together for the house. I also made the wooden floor for the first floor. I'm not happy with the colour so I may re-paint it a little darker. 


This is the base and the first floor, with the floorboards before I painted it. The floorboards are made from strips of 1/8th inch strips. I'm waiting for a flagstone stencil I've ordered from Bromley Crafts, to make the ground floor. (https://www.craft-products.com/brick-stencils.php). 


Or maybe I won't re-paint it ... It looks better much than I remember from last night. I want to re-paint the black "lines" in between the planks though. There are mistakes you see much better in a photo!

That think in the pictures is the stairs. I couldn't work out how the pieces went together, but I eventually cracked it - I'd been looking at the steps the wrong way round!

I can't do much more now because I can't find my paint brushes. I saw them recently whilst I was tidying up in the craft room, and I know I put them somewhere out of the way and even thought "I'm not going to find these when I need them", and I was right ...