I started on The Little Stump House on Wednesday. I had 5 empty Pringles tubes, but I didn't want to throw the surplus away until I had attempted to use one of the tubes for this project. Since it turned out OK I threw the other 4 tubes out today!
The Pringles tube with the cut outs for the basement and the other 3 floors above.
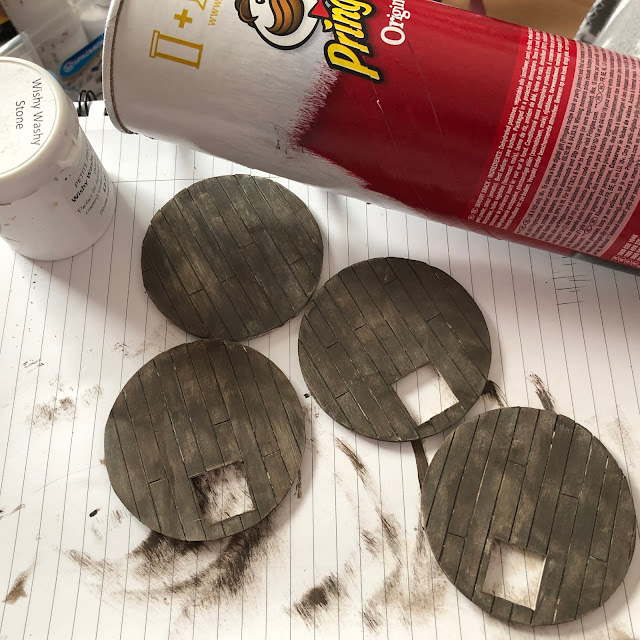
These are the ceilings (floors on the other side ...)
The method for making the wooden floors in the instructions is very easy ... but somehow I never get it right, so - after I'd spent ages trying to get the colouring/shading right - I decided I'd go back to my favourite method, which is using ¼" strips of card to make the planks. Think they turned out OK. But I had to go and spoil it by trying to darken in between some of the wood planks with a pen ... I had to then re-paint a couple of patches.
The walls. Card cut to size, strips of crumpled up tissue paper (I had to use a piece of pale pink ... and thankfully I had enough for the four rooms! The paint technique gives the wall a nice slightly distressed look.
The basement, with the two pantry shelves in place. The top shelf if a little lopsided ...
Bea suggests filling the pantry shelves before you put the beamed wall on ... but I didn't want to have to wait, so I fitted the wall on. If I later on decide I want to add a few bits on and under the shelves I'll have to use long tweezers!
The basement ceiling/ground floor floor in place -

I was painting, cutting and fitting for about 15 hours on Wednesday! I just had to get the walls for the 3 top rooms finished before I went to bed ... but then I realised I'd cut out a window in the wrong room (luckily just the card, and not onto the side of the Pringles tube), plus I'd only made two walls and I needed three! I'd planned to make three new walls on Thursday, but I was running out of tissue, and was going to have to resort to using red tissue paper. I didn't think I was going to make the fireplaces (those triangular pieces below), because I didn't think I would be able to get them right, but next morning I thought I'll just grab a piece of kitchen foil ... and I was pleasantly surprised that it worked the first time! Then I read I needed to make two more ... What I couldn't get right was the painting, the acrylic paint would just rub off the foil, so I added a layer of black tissue paper, and painted on top of that and it worked out fine. I'd cut a window into the wall of what I thought was the first floor, but was able to use it because the fireplace covers up the hole very well!

Two of the fireplaces in position - there's one in each of the top floors.
That's the interior finished, now I have to work on the exterior! I need an Oasis block I've bought on AliExpress, but in the meantime I want to paint as many of the other little pieces as I can.
Haven't done anything today - the day's been pretty gloomy ... and I have a pain in my hand from all that cutting and painting! So let's see how much I can get done over the weekend.
*********************************************************************************
OOPS!! I've just realised that I've put the interior door (which you can't see in the photos) on the wrong wall and in the wrong room! It's supposed to go against the back door on the ground floor (ie the second room from the bottom ... basement, ground floor, first floor, second floor ...!) So I'll have to remove the door as carefully as I can and maybe have to make a new bit of wall - thing is I don't have any more of the pale pink tissue paper ... but I have some light blue/turquoise ...
Phew - fixed it!
First I removed the door.
Had to peel off some of the paper which had come off the back of the door, which uncovered some of the pink tissue paper ...
I then re-painted and distressed that bit of wall. Worked out much quicker and better than I had hoped. I also had to stick the card back onto the inside of the Pringles tube because it had come unstuck.
The end result -


