Visitors

Tuesday, 29 May 2018

Some More Minis

I made a few more things for the gift shop. I found the three wreaths and watering can in a box the other day. They were meant for the flower shop, but I thought they'd fit better in the gift shop.

I made the BAKE and heart hangers from wooden scrapbook bits, patterned paper and those little knob things ... the name of which I can't remember at the moment.

The three signs are simply printed images, stuck onto card.

And the flower bird is a craft embellishment - I didn't have to do anything to that one.


I made this other sign, but I forgot to include it in the photo above!


And these two mirrors. The one on the left is a wooden piece, again for crafts - scrapbooking, cards, whatever. The one on the right I've had for ages. I have a large roll of mirror card which I use to make the reflective glass.


Oh, and I found more flowers, so I'll have to make more of the flower buckets to put them in - luckily I still have some of the paint I mixed.

Sunday, 27 May 2018

Lantern

I started making boxes, from pdfs I bought on Etsy, but I wasn't enjoying it and gave up. I will try again some other time.

I added a handle to the top of the lantern, and I think that's going to be it for today ... not in the mood to make stuff today.


Saturday, 26 May 2018

Filled Flower Buckets

Can't believe I had just enough flowers to fill the 6 buckets I made! I had to mix flowers in most of the buckets, but I think it looks nicer like that. They're now ready to go into the shop. 😁


Bags of Compost

Just made these three bags of compost. The labels are my own. I filled the little self-seal bags with model makers landscaping material.


Flower Buckets

I've finished the flower buckets. I have lots of cut flowers to display in them - roses, tulips and lillies mostly. Those, of course, will go in the flower shop. I will add dried baby's breath when I have it. I bought small bunches in several colours on eBay, but parcels can take months to get here!


Lantern

I made this lantern, from instructions from Annie from We Love Miniatures. Could have turned out better, but I was too impatient and couldn't wait for the glue, or the paint, to dry.


Thursday, 24 May 2018

Zinc Flower Buckets, Cake Signs, etc

Thought I would add a bit of lace along the top of the little basket I made the other day. Looks cute!


I'm making "zinc" (card ...) flower buckets, following instructions from a YouTube tutorial by Annie, from We Love Miniatures. I've made up the buckets and painted them grey, and the next step is to add a coat of the grey and silver paint to create the zinc effect.


I wanted to make some signs to "sell" in my miniature gift shop, and I thought I had pictures from magazines I could use, but turned out all I had were pictures I'd found on Pinterest. I printed a few out, but I didn't like how they came out ... so I ended up buying some (7!) on Etsy. And then, today (or yesterday - it's way past midnight!), I cut these two out, stuck them on card, and distressed the edges ... and they actually look OK! I'm not sure if I'm going to use them in the shop, or leave them for the 1:12 dollhouse, for the cake shop/tea room on the ground floor ...

I've also bought a few candles and other things from another seller on Etsy. I wanted to make as much  as I could myself, for the shops, but there are some things that end up cheaper to just buy. I do have some jars, and I want to make a few Yankee Candle-style jar candles though, those look very realistic when made well.


Tuesday, 22 May 2018

Miniature Quilt

I cut hexagons from paper, but it was soooo difficult getting the fabric to fold correctly, so I cut new card pieces and used those.


 I spent the day sticking fabric to card ...


And making the flowers ...


And then I realised it was going to be too large to put in the shop, above the fabric shelves after all! I'm going to finish it, and maybe I can find somewhere else to put it.

And here is one of my assistants holding my (unfinished) quilt.  (Cody.)


Saturday, 19 May 2018

A Few More Things ...

I didn't like the colour of this, so I re-covered it in darker scatter. This is the leftover landscaping scatter from the Yule Tide Christmas Shop.


Had these wooden pieces I bought in Portugal years ago.  Not quite 1:12, but they work.

I painted this jug and put a rub-on on the front of it. Didn't quite get it straight ...


Made this rug from string ...


 And these lamps, using the wooden pieces, as above. 


Then I had this crazy idea ... I want to make a small quilt/wallhanging. To make things easier I'm going to glue the fabric seam allowance to the paper - something which I don't like to do in full size. I've made a few, but I can't get the hexagons accurate enough over printer paper, so I'm going to re-print the hexagon pieces onto card and try again. 


The one on the left is so out of shape ...


Friday, 18 May 2018

Not Very Much ...

Haven't done a lot today ... I think I did enough yesterday! 

Last night I made this simple topiary. ↓ I may add more "foliage" - it's a little bald in places, and maybe add either a tiny stencilled heart on the flower pot, or attempt a simple dot flower.

The shop is slowly filling up.

I'm going to wait until I've got all the fittings in place to see what I want to do, but I'm thinking of adding panelling to the walls - I've got a few packs of panelling. Right now all of the shops look alike, with white painted walls, and at this stage, with everything fully assembled there's no way I'm going to try and re-paint, but the panelling I can paint before I stick it onto the walls.


And today I made this little hamper/storage basket. Not very inspired ...


I also re-painted the "create" sign and put it on top of the fabrics cupboard, but I'll probably re-paint it a darker/different colour, because it blends in with the white walls. Or I can make a simple patchwork quilt or hanging to hang above the cupboard. I'm thinking of using tiny hexagons.  If I make a wallhanging or small quilt I don't think it should be too difficult. I wonder how small I can go with the hexagons though ...


I've also made a couple of lamp bases, but I don't know if they're big enough. I want some nice ceramic beads, but can't find one I can use.

Wednesday, 16 May 2018

Jane Harrop Kits


I received a parcel full of Jane Harrop kits yesterday. Most of the things are for the gift shop.


A mirror and memo boards for the gift shop. I managed to break the blue frame whilst I was painting it, and had to stick it back together. 


I left the crates unpainted, but painted the fruit box green, and one of the slatted trays cream. The tray is on the counter, with the pot pourri baskets in it. I have another one which I've left unpainted for now, until I decide where I'm going to put it. 

The steps I stained with wood dye. It's taken me all day to complete all the kits, but I've had so much fun1

Sunday, 13 May 2018

Haberdashery

So, now that I'd painted the fabric rack, I thought it was time I filled them - it's only taken about  8 years!


And here they are -

There were more bales than I had room for, so I had to discard a few. There's a gap on the top shelf because the missing bale is sitting on the counter waiting to be cut out.

In my mind the shop is much bigger than it acutally is, so now I've got to be careful not to cram too much in. I still need to add the yarn display, the pre-cut fabrics, and so on ...

A Few Things

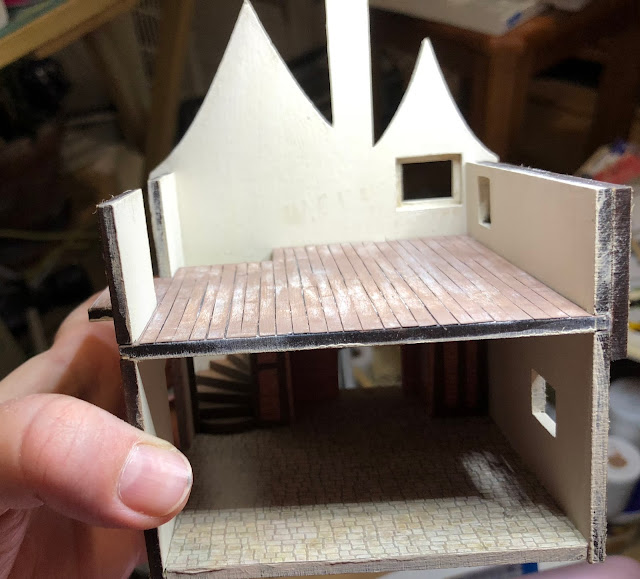
I need to be in the right frame of mind to tackle the stencilled brickwork on the Winterberry Hall chimney stack, so I've left it to the side for now.  I did spend a while re-painting the exterior beams yesterday, but that's about it.


These ↑ are going to be soaps for the gift shop. They're made from the very soft Japanese air dry clay, using empty pill blister packs for moulds. I need to get some tissue paper to wrap them up - I only have a piece of white paper, but I know I havve more somewhere.


I gave the fabrics rack a few more coats of paint. I'll probably add a thicker top - either from thicker card or from dollhouse floorboards or something.

I found the "create" sign in a box I "borrowed" from my sister. I went up to feed the 3 cats (my sis is in Italy), and they'd throw this plastic box, full of wooden embellishments, on the floor, and I brought it home to see if there were any bits I could use. I did ask permission!

So I've got the "create" sign, which I want to paint and put on top of the fabrics rack, as in the pic above. I also got a "love" sign, which I want to paint and put in the gift shop, and a frame, which will probably end up as either a mirror or a message/pinboard, again for the gift shop.

I found this pack of cheap wooden doors and windows I bought ages ago from Panduro. Haven't been able to use any of the pieces until now. There are boomerang-shaped bits and two long rectangular pieces which will work as shelves and brackets.


But there was also this window frame. I first painted it brown (Old Beams paint from Petite Properties), and I then distressed it. Think it turned out really well ...


It took me several attempts to make the wreath, but i got there in the end. I've used some mini tinsel, first twisting two lengths together, to make it a little thicker. I couldn't get the two ends to stick together, but I tried a piece of green thread on a needle, and added a bit of Tacky Glue, and it worked!

This is going in the gift shop.


Thursday, 10 May 2018

Winterberry Hall

Back to Winterberry Hall. 

I received some brick and stone papers yesterday I bought on eBay. I opened the envelope, and I immediately cut out the stone paper and stuck it down. That was going to be it, but I then couldn't stop!

I don't like to use papers, I'd much rather try doing the bricks and stonework myself ... but I decided I'd use them and I'm glad I did.  I didn't trust myself doing the air dry clay, or stencil, bricks and stones ... The paper looks OK, but I'll probably distress it a little bit it looks slightly shiny. The vertical (don't know the technical term) brickwork above the fireplace was very fiddly. I cut out the individual tiles from the paper and stuck them on, one by one! Not perfect but, again, if I distress it will disguise any of the iffy bits.

The floor paper has a faded patch I also need to disguise, so, again, I will probably distress it a little bit. I tried to dab off a tiny bit of glue off the paper and the design rubbed off!

I was going to try doing the brickwork on the exterior - on the chimney stack - but no, I think I'll use paper again - this time the brick paper from Petite Properties.


I spent hours painting the exterior beams, and they need another coat of paint, but that will have to wait until tomorrow - my hands, and back, are aching.


Wednesday, 9 May 2018

Blue Kitchen Dresser


This is a kit and online lesson from Jane Harrop. It's from 2007! I knew I had it somewhere, but I couldn't remember it being this nice! I never got round to finishing the project - I think because I didn't know where I was going to put it. There's no more room in the dollhouse, and I didn't want to make another roombox, so it was stored away all this time.

Now I'm going to put it in the gift shop. I think it will look great with lots of kitchen themed bits and pieces.


I found these ice cream glasses and jars (there are more) in the box with the dresser, and I'll probably use them to make candles for the shop.

The rest of the kitchen bits will find their way to the dollhouse kitchen or the roombox. The roombox is in need of some work - the furniture has come unstuck and I need to fix it and put it somewhere where it can be seen.

The blue chair in the flower shop is from this kit -


This was another of Jane's kits/online workshops - on Sunday at 8.30 pm! I

I only made the chair, and some of the cleaning bits, but didn't use it as it was meant to go, with the cleaning stuff on the chair, because it was a little too old fashioned for the dollhouse or roomboxes. I only "do" modern, but of course the chair found a place in the shop.

I'm going to find places for all of the other bits I found in the box.